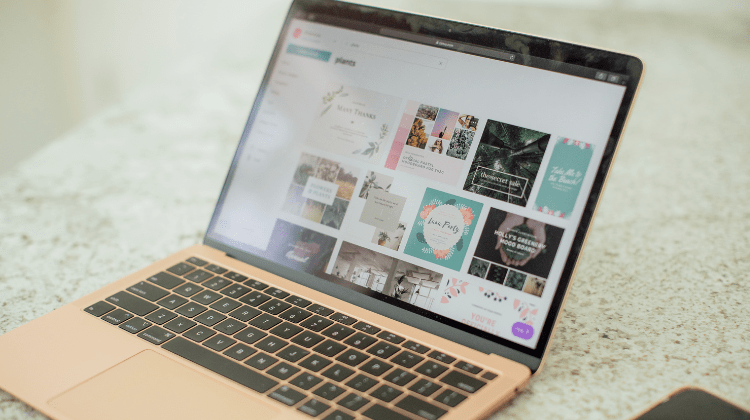
Canva is a browser-based design tool to create images. Canva has made creating graphics very easy for non-designers. There is also an app to use on mobile devices so you can create on the go.
Benefits Of Canva:
- Social Media templates
- Stock images for free or pay a fee to use pro.
- Lots of icons, stickers and more.
- Save your photos to edit or download.
- Easily share templates.
So you have come here to learn about Canva. We have all the information below in our insightful Canva Guide to help you start creating in Canva and become a pro in no time. Canva is free to use, but there is a Pro version to access their premium features which we will discuss later on.
In this Canva Guide, we will cover step by step how to create a design for an Instagram Post and a TikTok video. We will also cover features inside Canva that you may find helpful.
How To Use Canva Step By Step
We will start by creating a simple Instagram Post. The Instagram post will be a graphic that a clothing company is posting to promote their new sale.
Step One: Search For Instagram Post
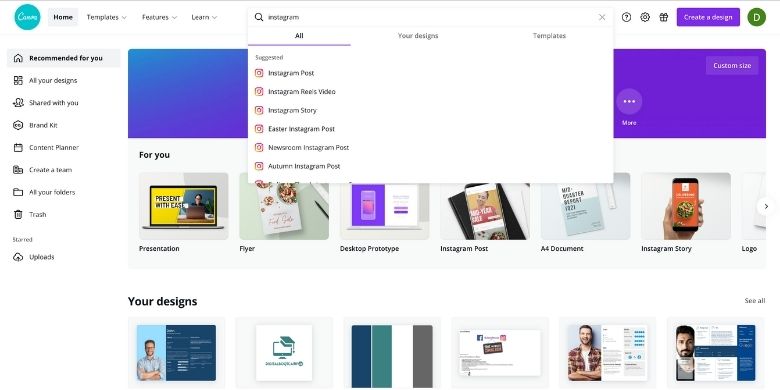
We will start by selecting the document layout we need to create an Instagram Post. Instead of inputting the dimensions ourselves, Canva has simplified the process. All we have to do is search for Instagram Post and select it. This will then give us a square canvas to work on. This is Instagram’s dimension size for posting.
Step Two: Create a Blank Instagram Post
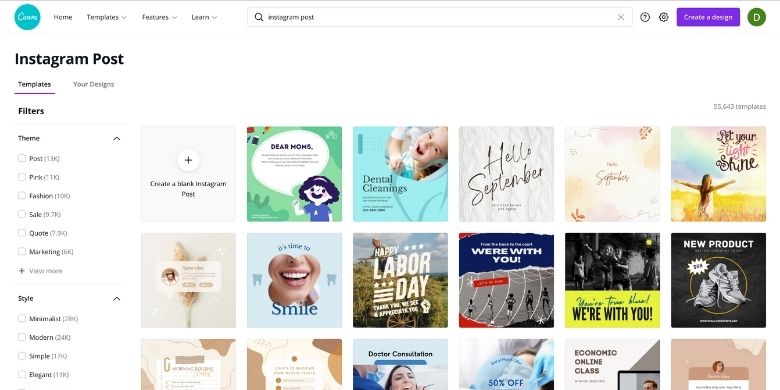
Canva has a range of templates to choose from for easy posting to your social media. They can be great for a quick post, but we will be creating a design from scratch. Choose the blank post, then proceed to the next step.
Step Three: Set Your Background
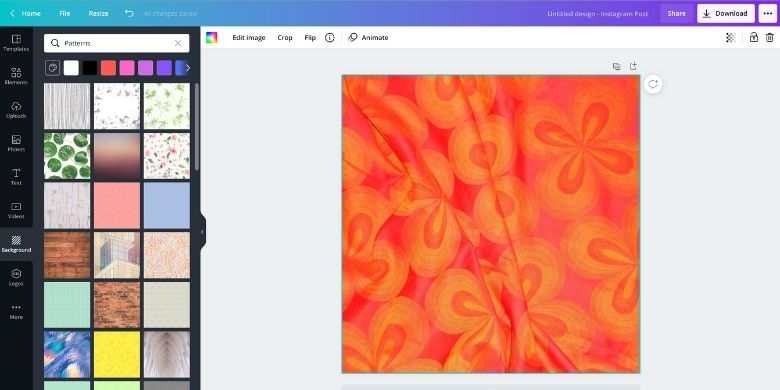
Next, we will set our background colour. For this, select the background icon on the left-hand side tab. Here you can choose between colours, patterns, gradients and more. We browsed the patterns and selected this stunning red floral pattern for our post.
Step Four: Add Your Text
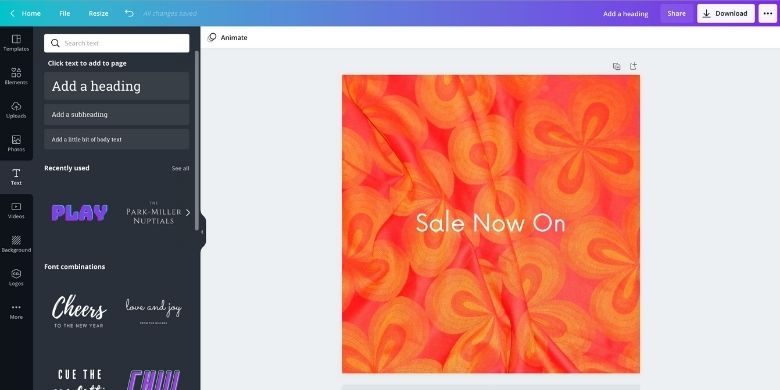
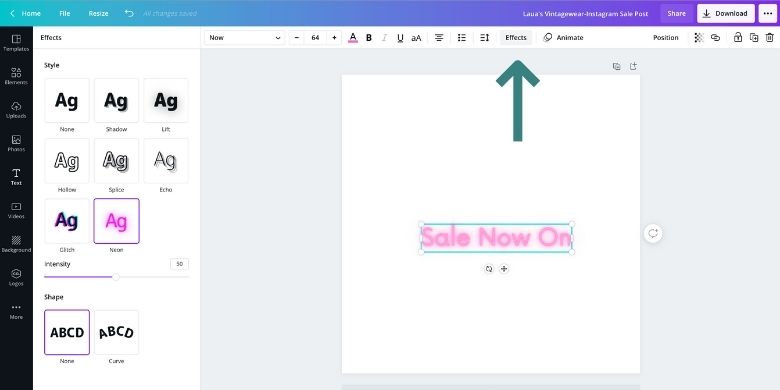
We will now add some text to our Instagram Post. Go to “Text” on the left-hand side tab to add text. Here you can choose a font combination, a heading, subheading or a body of text. We will add a heading. The heading will be added to the canvas.
We will then change the font on the top toolbar. Here we picked a font we like called “Now”. We will now change the text to “Sale Now On”. To increase the font, we change the font number to 64. We change the colour of the font to white in the top toolbar also. Our text is now complete and looks like the image below.
Step Five: Add a Graphic Element
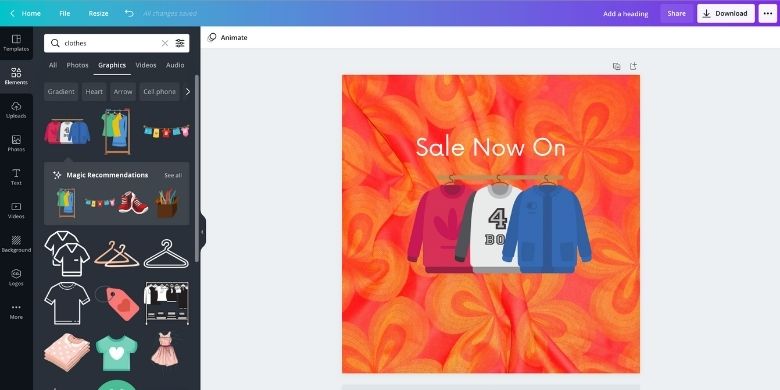
We want to add a little creativity to our post, so we will add a graphical element. To do this, we select “Elements” on the left-hand side tab. When we’re here, we choose Graphics from the options available. We searched for “Clothes” and picked one of the options we loved the most. Now it gives the viewer an impression of what’s on sale.
Step Six: Add Shop Name

To finish off the design, we will add text as we did earlier. We again will select a heading and use the same font. We will type in “Laura’s Vintagewear’. We are adding the shop name, so the viewer knows that our shop is running the sale.
Step Seven: Finish And Save
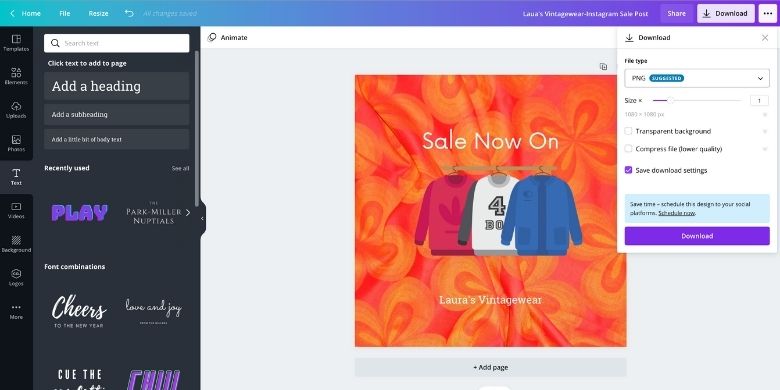
We have now finished with our design. We will add a file name to the image on the top right-hand side. After this, we will download it, and it is ready to be uploaded to Instagram.
This, of course, is a straightforward design to give you an overview of the basic tool layout. With Canva, we can create much more creative and advanced images for social media and print. We will look at this later.
Video Tutorial
We created a video tutorial on these simple steps to give you a better impression of creating an Instagram post in Canva. We will post more videos on our youtube channel, so be sure to check it out.
Other Features
In Canva, there are numerous design features to create graphics. We will outline many of these below.
Font Effects
The first of these features are Font Effects. To access these effects, add text. Then click on effects on the top toolbar. Once this is done, you will see a range of effects on the left-hand side, which we can apply to the added text. We can then change the intensity of the effect and more.
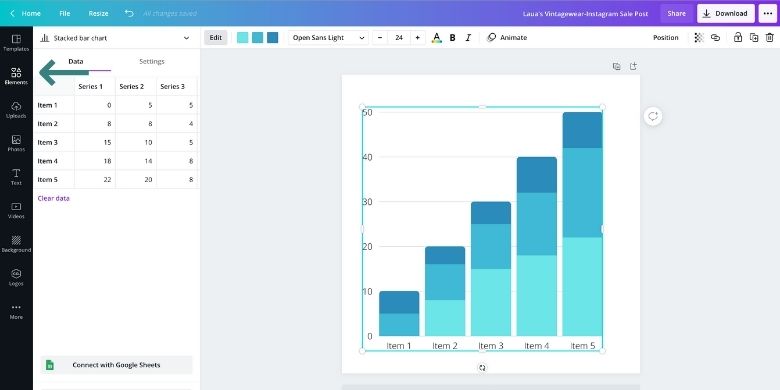
Charts & Graphs
You can find the Charts feature inside the elements tab. This is an excellent resource on the Canva website. Maybe you have information that you want to input into a chart or graph? Then you can do that inside this feature. You can input your data in the boxes on the left-hand side, and the graph will change to reflect that data.
Elements
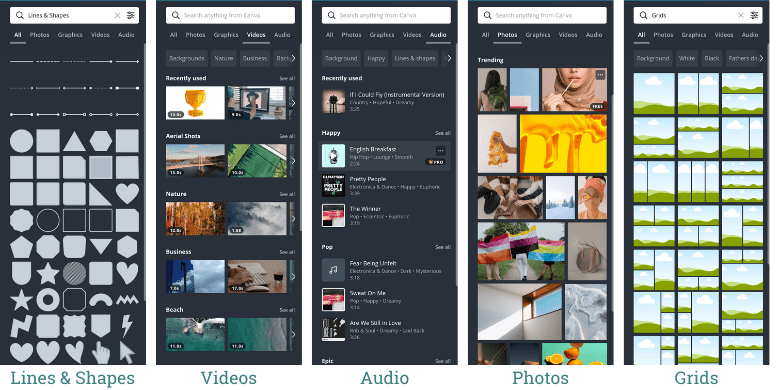
We have already outlined some of the features inside the elements tab, such as fonts, graphics and charts. The other features you can access here are lines and shapes if you need to add a creative shape to your design. There are stock videos that can be added to an Instagram Story. There is audio that you can add to the back of a video. There are photos that we use all the time for our website and social media. The last feature is grids. Here you can insert multiple images inside each box.
File Type
To download any image, you just press the download button. You can save the file type in another format just by changing the file type. To save a printable version of your design, you change the file type to PDF Print. Now you can print the image. This means you can create documents, posters, booklets and much more.

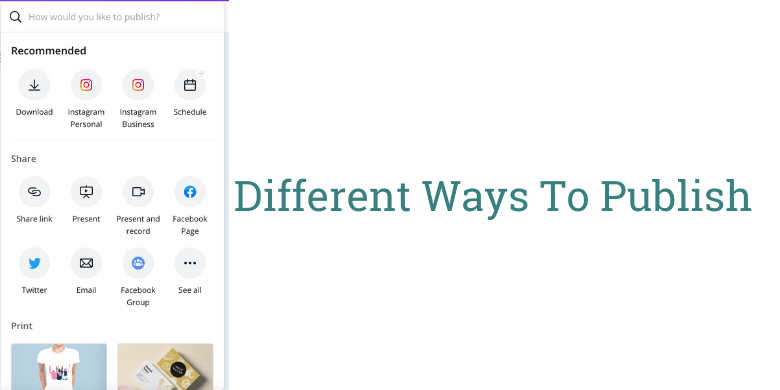
Publish
When you click on the three dots on the right-hand side of the download button, you will see the options below. There are options to post from Canva directly to Instagram. You can also schedule a post to go up at a later date if you’re working off a content calendar. There is no shortage of sharing options on Canva. You can present work that you have created and even present and record a presentation inside Canva. The other options are to share to Facebook, Twitter and email it to a contact.
Shortcuts
We all love shortcuts to save us time in anything we do. Of course, Canva has a list of shortcuts for you to use to speed up the process of creating. The list is below.
- Zoom in: Command +
- Zoom out: Command –
- Delete: Delete key
- Search: Command ?
- Drop in text: T key
- Select all: Command A
- Move 1 pixel: arrow keys
- Move 10 pixels: Shift arrow key
- Undo: Command Z
- Redo: Command Shift Z
- Copy: Command C
- Paste: Command V
Overview
So, now you know the basics to get started on Canva. You know the different features you can use and how to add text and elements to a canvas. You have to get busy and create now. For us, it was all about trial and error. We use it so much daily that we know everything about the website now. Of course, programs like Photoshop and Illustrator are more feature-heavy and can give you unique solutions. Canva is a fantastic tool for those quick jobs and creating for beginners.
How To Use Canva For Special Occasions
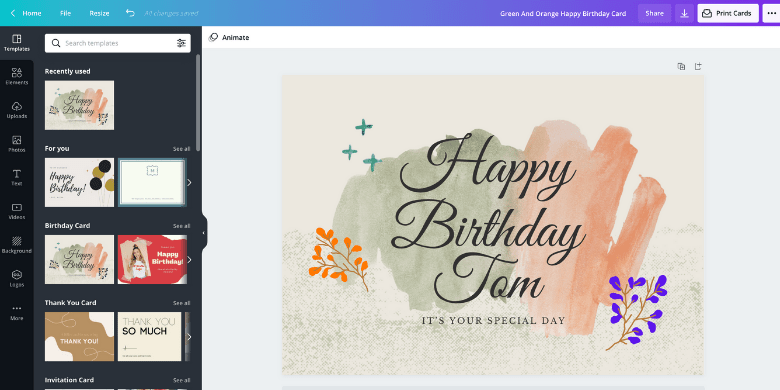
Canva has a range of templates for cards. The card sizes come in many different variations. For this exercise, we chose the classic landscape card design. When we picked this, a range of templates pops up. We can decide on the templates. We decided to pick the happy birthday card template. After this, we can personalise the card and add more detail to it.

After we picked a template, we added our touch to it. We added in the name “Tom” to personalise it for the recipient. We also changed the colours of the elements. This is easy to do. You click on any element, and it will you the option to change colour. Not all elements are directly editable, so if you can’t change the colour, that shape or object is not editable. Most of the Canva elements are which makes it great for personalising. We added Tom’s favourite colours, orange and purple, for the flowers for the final touch. The card is now finished in under 2 minutes with very few clicks, but it looks simply stunning.
So now you know both the basics and how to edit templates. Templates can be great if you’re in a rush and have to design something rapidly. They are also a great source of inspiration and a place to start your design. We recommend beginning creating your designs rather than using a template. If you use a template, you run the risk of not being unique. The work has probably been posted thousand of times. Next, we will cover how to edit videos on Canva such as TikToks, Instagram Reels and more.
How To Make a TikTok in Canva

Tiktok has grown in popularity in the last year and has become the number one app for young people to browse, upload and share. If you want to start creating TikTok’s but struggle to make good-quality videos with your phone, then create them all using Canva’s video editor. Users enjoy using their free online video editor since they can craft their own videos using hundreds of templates available.
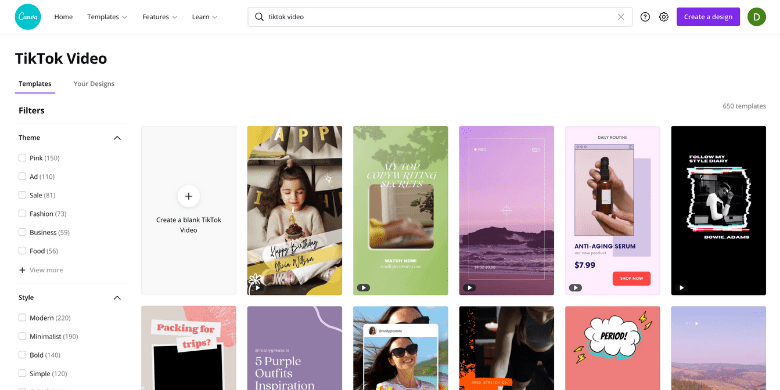
Step One: Search For TikTok Video

Firstly we must search for TikTok to get the correct dimensions for a video. Videos on TikTok are shown in Portrait mode. We will select the first option, which is “TikTok Video”.
Step Two: Choose a Template

To show you how to create a TikTok video, we will use one of the templates to give you a better idea. Choose one of the templates from the list below. They have a range of categories for you to choose from.
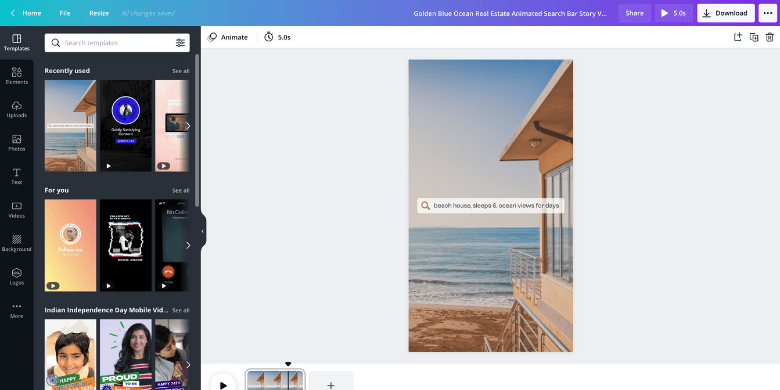
We decided to pick this beach template. We will edit the whole video to outline how to edit using the video editor in Canva. This could help bring your TikTok videos to the next level.
Step Three: Choose a New Video
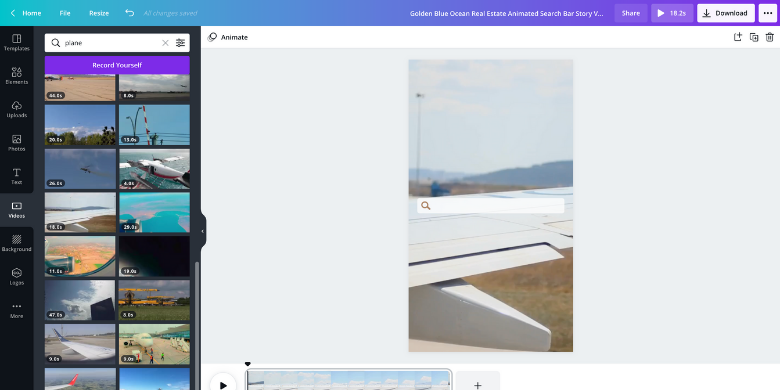
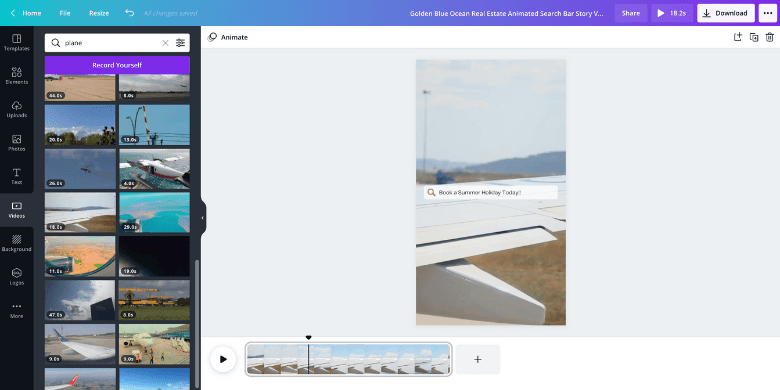
We deleted the placeholder video that was in the template. We want our TikTok video to promote an airline. To do this, we search for “Planes” in the video tab on the left-hand side. We picked a plane taking off and fit the video inside the TikTok canvas.
Step Four: Change The Text
Next, we decided to change the text that Canva already input. It gives the effect of someone typing out a sentence on Google. Our idea for the video is to type in “Book a Summer Holiday Today!!”. Saying this gives the feel of it being a promotion to buy flights. We can change the font and the colour just like we did in the earlier lesson.
Step 5: Download and Share
To download the TikTok video, just download the video from the top right-hand side. This is the most basic TikTok video to do. It is just enough to help you create your TikTok videos. You can again add graphics and others from the elements tab, just like earlier. You can also add music here if you want to, but it’s best to do that inside the TikTok app. We hope this will help you kickstart your TikTok career!
Conclusion
We hope this Canva Guide will help you become more familiar with Canva and all its unique features. Canva is constantly updating its website with more and more features, so keep an eye for more articles on Canva in the future. Now that you know the capabilities and simplicity of Canva, you might start using it to create social media content or documents. It has been a massive help for our business and countless others.